How to Upload Files to Remote Server Using FileZilla and WinSCP
Categories: DevOps & Cloud Deployment
Uploading files to a remote server is an essential skill for anyone managing websites, cloud servers, or VPS hosting. Whether you're deploying a Django application, backing up files, or managing your WordPress site, knowing how to transfer files securely makes server management much easier.
In this guide, I'll walk you through two beginner-friendly FTP clients: FileZilla and WinSCP. Both are free, open-source tools that support SFTP (Secure File Transfer Protocol) to keep your data safe during transfer.
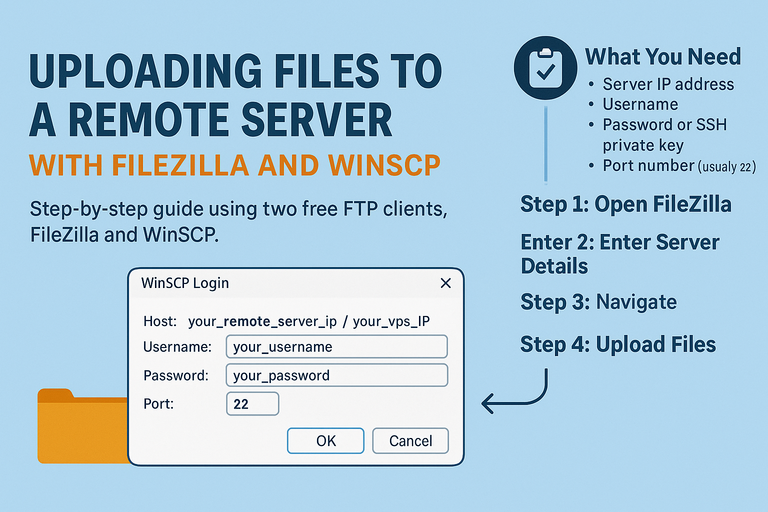
What You Need
• Server IP address
• Username (e.g., root or ubuntu)
• Password or SSH private key
• Port number (usually 22)
Step 1: Open FileZilla
Install and open Winscp or FileZilla on your PC. In this case i will show you winscp. but both are same.
Download:
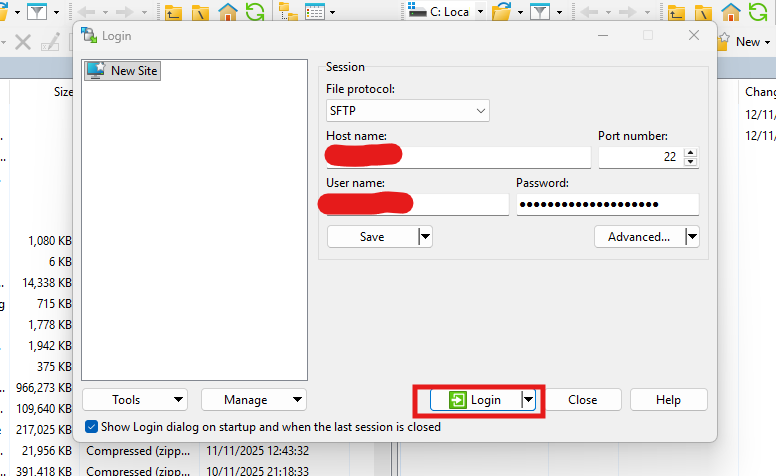
Step 2: Open Winscp and Enter Server Details
At the top bar:
-
Host: your_remote_server_ip / your_vps_IP
-
Username: your_username
-
Password: your_password (or leave empty if using key)
-
Port: 22
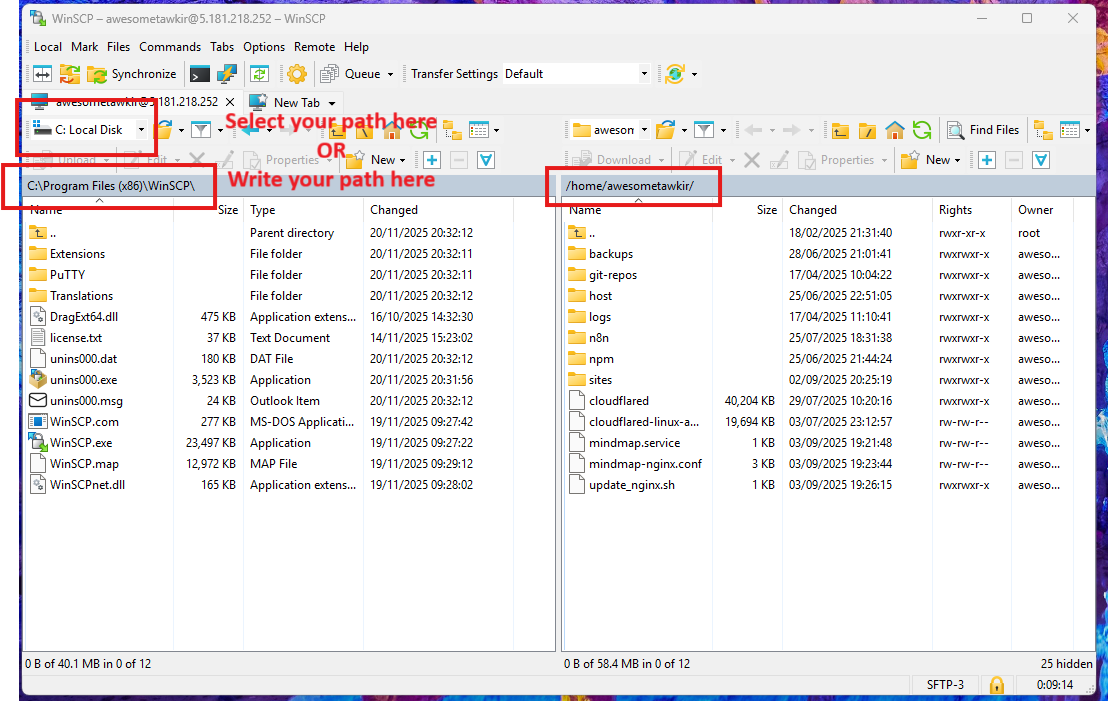
Step 3: Navigate
• Left side = your local computer
• Right side = your remote server
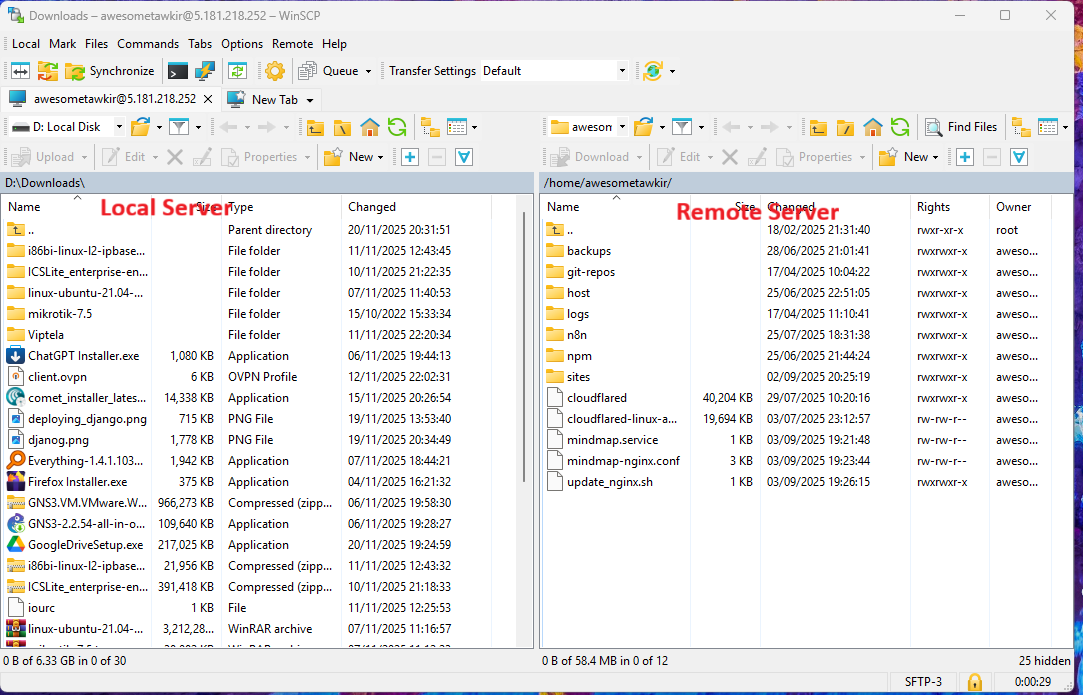
Tip: You can also change your folder path here
Step 4: Upload Files
Drag any file/folder from the left panel and drop it into the right panel.
The file will instantly upload.
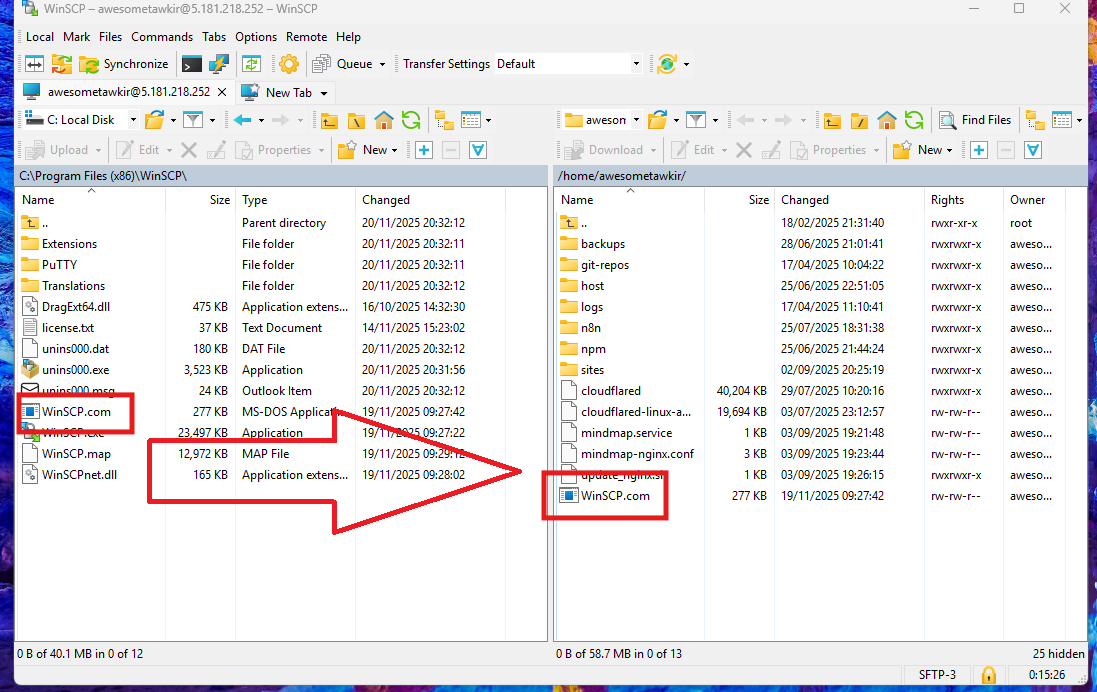
In this case For example I dragged and dropped WinSCP.com file from local server to remote server.
Troubleshooting
• “Connection refused”: check SSH is running.
• “Permission denied”: wrong username or private key.
• Slow upload: try SFTP instead of FTP.
Comments (0)